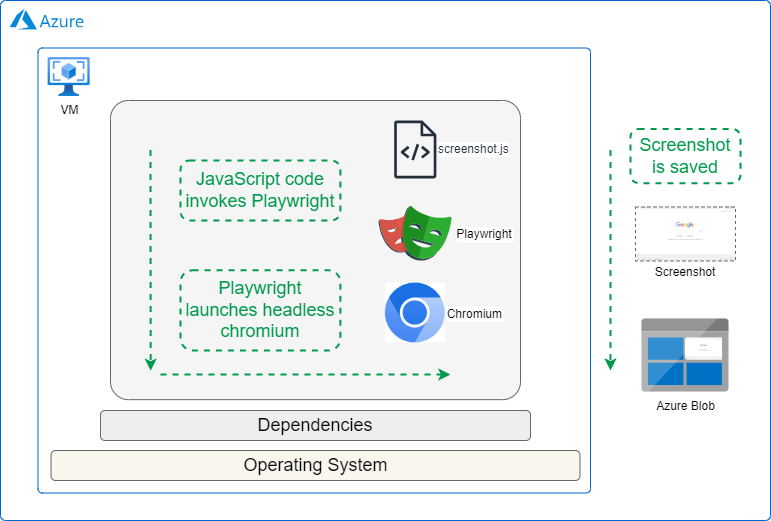
Deploying Playwright on AWS EC2 is a versatile solution for automating browser tasks such as web scraping, end-to-end testing, and interacting with modern web applications. But, it requires some dependencies and configuring to run smoothly.
In this guide, we’ll cover everything from selecting the appropriate instance type to installing necessary dependencies and configuring the environment for optimal performance, followed by running an example to capture screenshots. We’ll also look at using separately hosted browsers to simplify things.

{{banner}}
Choosing the Right Azure VM
When deploying Playwright on Azure, selecting the appropriate VM size is key to ensuring smooth performance. A Standard_B2s or Standard_B2ms VM with 4-8 GB of RAM is generally sufficient for running Playwright effectively.
For storage, allocating around 10 GB is recommended to handle browser binaries and temporary files generated during automation tasks. We will use Ubuntu as the operating system, which is suggested by default when provisioning a VM on Azure.
Launch and Connect to an Azure VM
To get started, launch an Azure VM with sufficient storage and connect to it using SSH. You’ll install Node.js and Playwright using commands in the following section. Playwright comes with bundled browser binaries and dependencies, it prompts you to install those while installing Playwright. If done correctly, there's no need to install dependencies separately however the commands to install them are included below in case required.
Installing packages and libraries
First install Node.js
Followed by Playwright and dependencies
This command will prompt to install browsers and dependencies. In case of any issues, they can be downloaded separately using the following command:
Configuring Azure blob storage
The code in the following section stores the screenshot in Azure Blob Storage, which needs the connection string and container name as described below. The library Azure VM requires to interact with Blob Storage is already installed in the previous section.
In the Azure Portal, navigate to Storage accounts and either select an existing account or create a new one. Under Data storage, select the Container or create a new container by giving it a name (this will be the container name). To retrieve the connection string, go to the Access keys section and copy the Connection string.
Make sure to use the container name and the connection string in your code where indicated.
Writing code
Once the environment is set up, test the following JavaScript code that captures a screenshot of a webpage given as input and uploads it to Azure Blob Storage. This ensures that the screenshots are easily accessible for testing and validation.
Create a new screenshot.js file and paste the following code.
Use the following command to run the code (note the input format with https):
Go and check the screenshot stored in Azure Blob Storage container.
Maintenance tips and challenges
Playwright and EC2 is a great combination, but it requires careful maintenance.
One of the most important aspects is dependency management. Playwright, along with its browser binaries, frequently releases updates to stay in sync with modern web standards.
These updates often bring new features, optimizations, and security fixes, which makes it essential to regularly update your Playwright version to avoid potential compatibility issues or vulnerabilities.
You will also need to keep an eye out for memory leaks. Issues such as zombie process and browsers not closing properly can gradually increase the resources needed to keep the automations running smoothly.
Run Playwright with Browserless to Keep Things Simple
To take the hassle out of scaling your scraping, screenshotting or other automations, try Browserless.
It takes a quick connection change to use our thousands of concurrent Chrome browsers. Try it today with a free trial.
The Easy Option: Connect Playwright to Our Browser Pool
Hosting Playwright is easy, it's the browsers that cause the issues. To simplify your setup, use our pool of thousands of concurrent browsers with just a change in endpoint.
You can either host just playwright-core without the browsers, or use our REST APIs. There’s residential proxies, stealth options, HTML exports and other common needed features.
