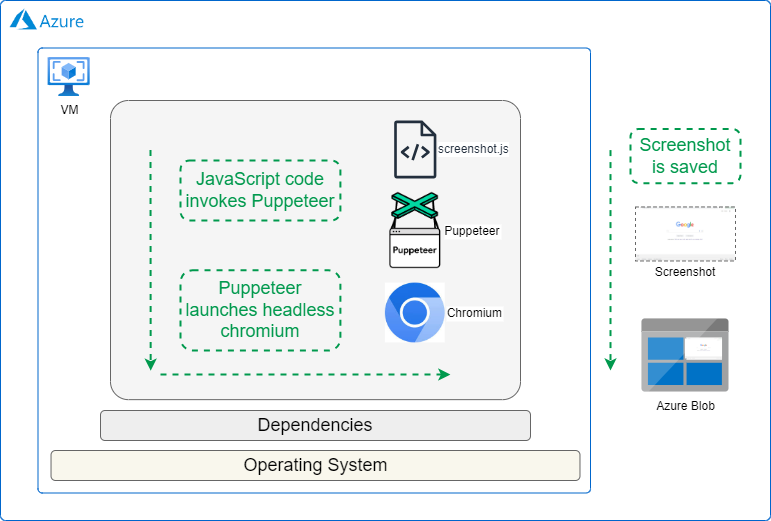
Deploying Puppeteer on Azure VirtualMachines is a powerful solution for automating browsers at scale, but it can be tricky to set up and maintain. There’s various issues you’ll run into such m missing dependencies.
In this guide, we'll walk through setting up Puppeteer on an Azure VM, from choosing the right instance type to installing necessary dependencies and configuring your environment for optimal performance

{{banner}}
Choosing the Right Azure VM
When deploying Puppeteer on Azure, selecting the appropriate VM size is crucial for performance. A Standard_B2s or Standard_B2ms VM with 4-8 GB of RAM is typically sufficient for running Puppeteer effectively. For storage, allocating around 10 GB is recommended to accommodate Chromium and any temporary files generated during operations.
We will work with Ubuntu OS, which Azure VM suggests when provisioning the VM.
Setting up VM and Puppeteer
Launch the Azure VM with Ubuntu, ensuring sufficient storage configurations, and thenconnect to it. Install Node.js and Puppeteer using the commands below.
We would recommend also installing system Chromium: While Puppeteer downloads its own Chromium by default, installing it separately give you more control. This ensures all necessary system dependencies are present and provides a fallback option for troubleshooting.
Along with this, we also install Azure Storage Blob client library for JavaScript. This is required for VM to store screenshot in Azure blob.
Installing dependencies
Dependency management sometimes becomes complex, as package names, versions, and availability may change over time and with different OS versions.
The following dependency list has been tested for Ubuntu on Azure VMs and represents the current working set. However, remember that as Ubuntu and Puppeteer evolve, this list may need updates.
Without the correct set of dependencies, Puppeteer fails with errors such as:
cannot open shared object file: No such file or directoryAn error occurred: Error: Failed to launch the browser process
Configuring Azure Blob Storage
The code in the following section stores the screenshot in Azure blob, which required the connection string and container name. VM also needs a library to be installed to communicate with the blob which we’ve already installed in the previous section.
In Azure Portal, go to Storage accounts and select or create an account. Under Data storage, find Containers and create a new one, giving it a name (this is the container name). To get the connection string, access the Access keys section and copy the Connection string.
Use the container name you created and the copied connection string in your code where indicated.
Writing the code
The following code takes the website URL as input, captures a screenshot and saves it to Azure blob.
Now you're ready to run a Puppeteer script to capture screenshots. Use the following command to run the code (note the input format with https) -
Managing deployments
Managing the dependencies and maintaining them continuously is a time consuming task.
Dependency installation can be hindered by resource contention issues, such as apt cache locks. These occur when multiple package management processes attempt to access shared resources simultaneously, potentially leading to deadlock-like situations.
Troubleshooting typically involves terminating conflicting processes, cleaning up incomplete package installations, and releasing system-wide locks. Proper resolution requires careful handling to maintain system integrity while resolving conflicts.
That’s before you get into issues such as chasing memory leaks and clearing out zombie processes. Without those steps, Puppeteer can gradually require more and more resources.
Simplify your Puppeteer deployments with Browserless
To take the hassle out of scaling your scraping, screenshotting or other automations, try Browserless.
It takes a quick connection change to use our thousands of concurrent Chrome browsers. Try it today with a free trial.
Want an easier option? Use our managed browsers
If you want to skip the hassle of deploying Chrome with it's many dependencies and memory leaks, then try out Browserless. Our pool of managed browsers are ready to connect to with a change in endpoint, with scaling available from tens to thousands of concurrencies.
You can either host just puppeteer-core without Chrome, or use our REST APIs. There’s residential proxies, stealth options, HTML exports and other common needed features.
